Configure Action Bars in Blocks
The Configuration tab in the Editor Experience panel enables you to determine the way your widget and its elements look and behave in the editor when they're installed on a site.
About Action Bars
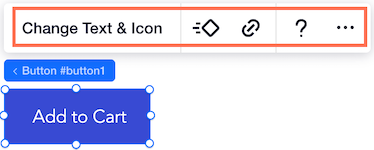
When a site builder installs your widget on a site and opens the editor, the widget and its elements have floating action bars, just like any other Wix site element. For example, this is the action bar of the widget's button, which allows the site builder to perform various actions on the button:
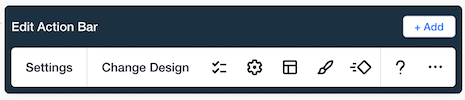
Blocks lets you modify these action bars. You can add, remove or reorder buttons. You can determine which panel opens when a button is clicked, and more. The modification options vary, depending on whether you select a widget, or one of its elements, and which element you select.
By modifying the action bars you can give site builders more options for customizing your app when they install it on their site. You can also decide that you want to limit what they can change in your widget.
UX guidelines Read our UX guidelines for clear and effective action bars
Modify Action Bars
To modify action bars:
- をクリックする。 Editor Experience
 panel.
 - Click the Configuration tab.
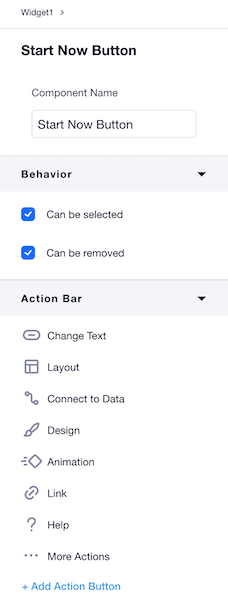
- Select the correct element in your widget, or select the entire widget from the Widgets panel.
Now, you can modify action bars in two ways:
- From the Edit Action Bar that appears:
- Or from the Action Bar section in the Inspector panel on the right (if you can't see the panel, click on the Inspector
 icon to expand it).
Removing and Adding Action Buttons
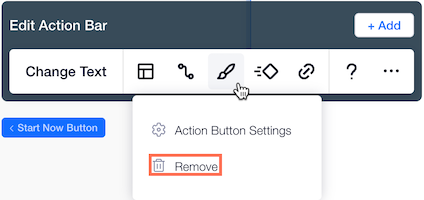
- Hover over the action bar buttons to see which of them can be removed, and click Remove to remove that button.
- Add any buttons you removed by choosing + 追加 in the Edit Action Bar panel, or Add Action Button in the Action Bar section in the Inspector panel on the right (if you can't see the panel, click on the Inspector
 icon to expand it).
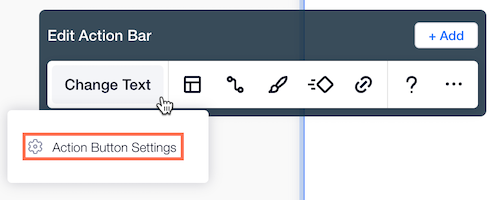
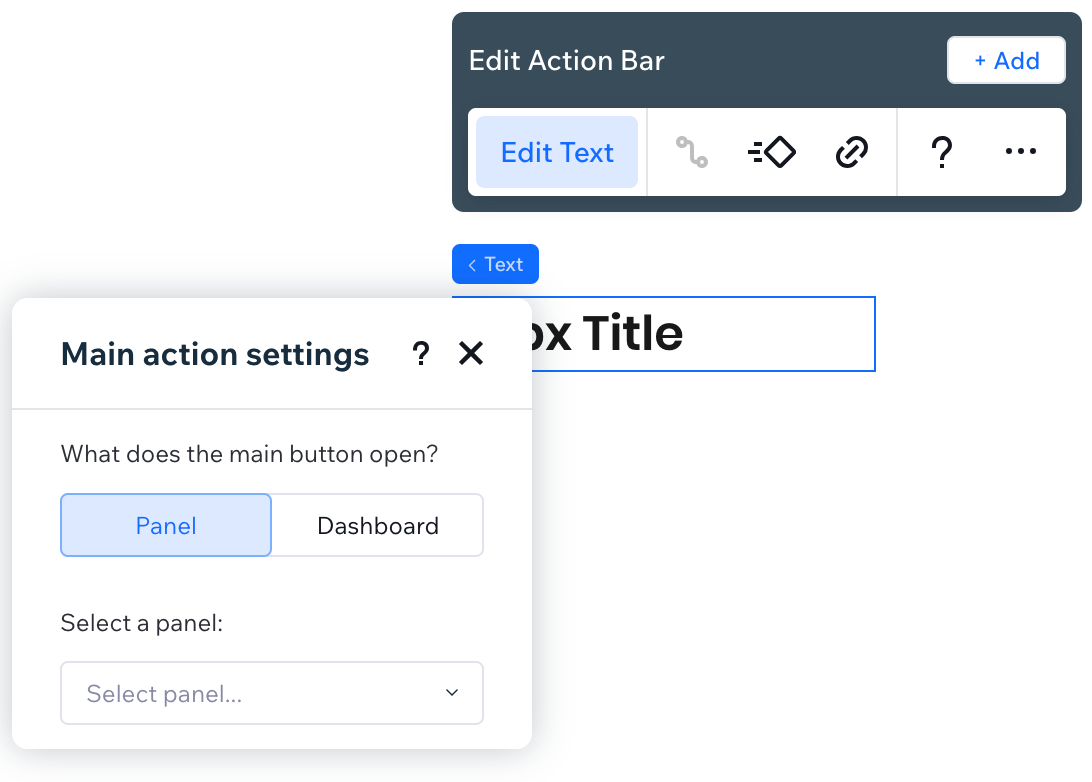
Changing Action Button Settings
- Hover over the action bar buttons to see which of them have settings that can be changed.
- Click the Action Button Settings button.
- At this point, you can also change the text of the action button.
- Select the panel or dashboard page that you want to open for the action button settings. You can also create a new custom panel and then assign it to the action button. Clicking Create Custom Panel will take you to the Panels tab.
備考
- When you add an action button you need to make sure that you assign a panel or a dashboard page. If you don't you will see a warning in the Inspector
 .
. - The changes you make when you are in the Configuration tab impact all design presets.
- Make sure to read our UX guidelines for clear and effective action buttons