Wix Blog: Adding Links in Your Blog
読了目安時間: 2分
Links are a great way to direct your readers to related content either on your blog or to a different site outside your blog. You can do this by following the steps outlined below.
To add a link to a post:
- Start writing a post.
- Highlight the text to which you want to add a link (the word "here" in the example below).
- をクリックする。 リンク
 icon.
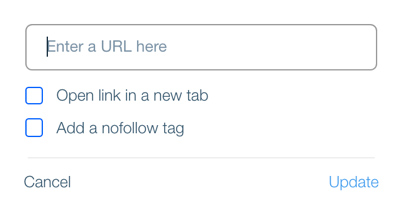
icon. - Enter the address (URL) you want to link to.
- (Optional) Select the Open link in a new tab to display the link in a new browser tab.
- (Optional) Select the Add a nofollow tag checkbox. To learn about nofollow tags, click here.

To add a link to an image:
- Go to your blog post.
- をクリックする。 プラス
 icon.
icon. - をクリックする。 画像
 icon.
icon. - Choose to upload media or select one from stock images.
- Select the image in the post itself and click the link
 icon.
icon.

6. Copy the link URL and paste it into the link box.
7. (Optional) Select the Open link in a new tab checkbox.
7. (Optional) Select the Open link in a new tab checkbox.
- Selected: When clicked on, the link opens in a new browser tab.
- Deselected: When clicked on, the link opens in the same browser tab.
8. Select the Add a nofollow tag checkbox to add a nofollow link.
Note: To learn about nofollow tags, click here.
9. Click Update.
Note: To learn about nofollow tags, click here.
9. Click Update.
これは役に立ったか?
|