Wix Editor: Adding Watermarks to Images
読了目安時間: 2分
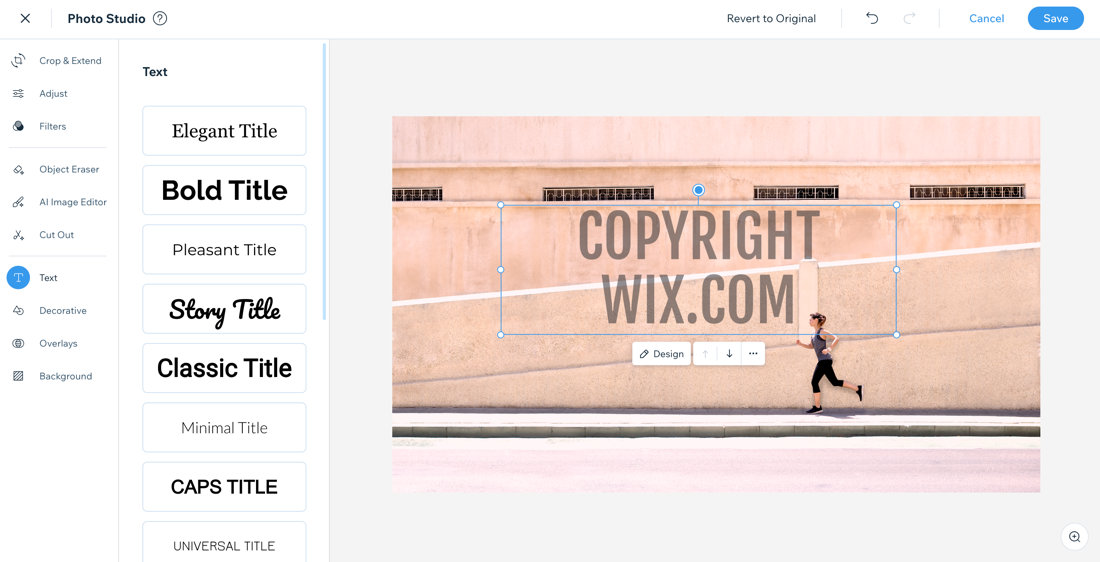
Protect your images by adding watermark text in Wix Photo Studio. The text can be customized to suit your brand, and cannot be removed from the file if downloaded.
To add a watermark to an image:
- Click your image in the editor.
- をクリックする。 設定 アイコン
.
- Click Adjust.
- Click Text on the left.
- Click a text style to add it to your image.
- Type your watermark message.
- (Optional) Click Design to customize the text:
- Font: Click the relevant drop-down menu to change your font and font size.
- Styles: Format your text using the options: Bold, Italic or Underline and choose your text color.
- Alignment: Choose your text alignment: Left, Center, Right or Justify and adjust your line spacing.
- Opacity: Increase or decrease the transparency of your text.
- Rotate and flip: Change your text orientation: Rotate left
 , Rotate right
  , Flip horizontally
  または Flip vertically
  .
.
- 保存をクリックする。
Want more options?
Learn how to protect your site's content.
これは役に立ったか?
|