Wix Automations: Creating Automations for CMS Form Submissions
読了目安: 5分
Use Wix Automations to ensure that all submissions you receive from custom CMS (Content Management System) forms are handled appropriately. This automation works with any CMS forms created with input elements. Choose from a variety of actions such as running Velo code, sending data via webhooks, or connecting third-party apps such as Google Sheets and Zapier. You can also automate more basic actions like sending or receiving emails, creating or updating contacts, and more.
始める前に
- Make sure to add the CMS to your site, if you haven't already.
- Make sure to create a custom form with input elements that submit to a CMS collection.
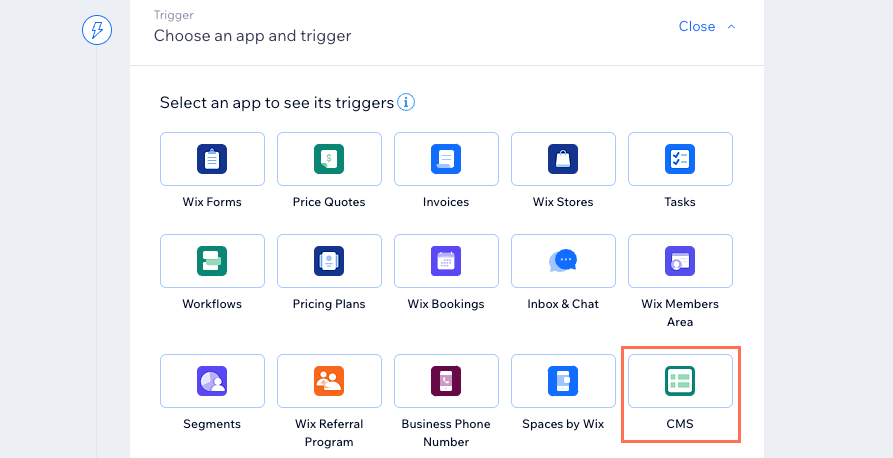
Creating a CMS custom form automation
When setting up your automation, choose the CMS trigger and whichever action you want to occur when you receive a submission from your custom form.
To create an automation for CMS custom form submissions:
- Go to Automations in your site's dashboard.
- Click + New Automation.
- Click + Start from Scratch.
- Click the title to give your automation a name.
- In the Trigger section, click CMS.
- Select an option under Select which CMS form triggers this automation:
- Any: Any form that uses input elements and the CMS triggers the automation.
- Specific: Specific forms that use input elements and the CMS trigger the automation. Click Select, then select the custom form(s) you want to use and click OK.
Note: Your custom forms are listed with the name of the page they appear on first, followed by the collection that stores the submissions.
- をクリックする。 Limit frequency to drop-down to set the trigger frequency:
- Don't limit (trigger every time): Your action will take place every time it is triggered by a visitor.
- Once per contact: Your action will take place only once per contact.
- Once per contact every 24hrs: Your action will take place only once per contact in any 24hr period.

- (Optional) Click + Add Delay to add a delay between the trigger and when the action occurs. Then choose how many days, hours or minutes to delay the timing by.
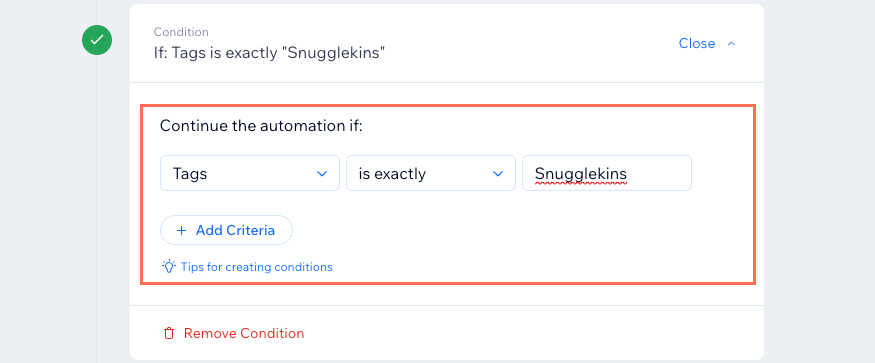
- (Optional) Add a condition that must happen in order for the automation to continue:
- Click + Add Condition.
- Click the Select criteria drop-down and choose the collection field to use in the condition.
- Click the next drop-down and choose an operator (e.g. equals, contains, is true).
- Click the drop-down or text box that appears next to your operator drop-down to complete your condition. The logical statement you've created will determine whether the automation continues.
- (Optional) Click + Add Criteria to add any further criteria.
- Select the action that will take place after the trigger (e.g. send an email, get an email, create a contact). Learn more about the actions you can choose.
Note: If you want to use the automation to update an existing contact or create a new one, select Create a contact. See the FAQ section below for more information. - Set up the action using the available options, which vary depending on the action type.
- (Optional) Click + Add an Action to add a follow-up action.
Note: It is not possible to add a follow-up action that creates or updates one of your contacts. Use the Create a contact as your automation's 1st action if you want to create or update contacts. - Click Activate to save and activate the automation.
よくある質問
Click below for answers to common questions about using automations with custom CMS forms.
How do I use the automation to update a contact or create a new contact?


How do I understand which automations are available to me?
Can I connect my automations to apps that I use outside of my Wix site?
これは役に立ったか?
|