Wix Stores: Adding and Setting Up a Wishlist
読了目安: 6分
Let your customers keep track of their favorite products by adding them to a wishlist.

Later, they can review wishlisted items and choose which ones to purchase.
Step 1 | Accessing the Product Page
When you add a wishlist button, it appears in the Product Page.
Wixエディター
エディターX
スタジオエディター
- 編集者のところに行ってください。
- Go to your Product page:
- クリック ページ&メニュー
 エディターの左側にある
 - Click Store Pages.
- Click Product Page.
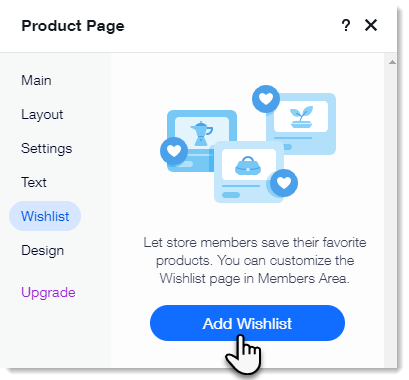
Step 2 | Adding and customizing the wishlist button
Now you can add a wishlist to your Product Page so customers can keep track of their favorite products. Customize the wishlist icon to suit your site's design.
注:
The wishlist icon appears next to the button you display in the Product Page ( the "Add to Cart" or "Buy Now" buttons). If you decide not to display either button, the wishlist icon turns into a button with text.
Wixエディター
エディターX
スタジオエディター
- Click the Product Page in the Editor.
- 設定をクリックします。
- Click the Wishlist tab.
- Click Add Wishlist.
- Click the Product Page in the editor again.
- 設定をクリックします。
- Click the Wishlist tab.
- Customize the button using the available customizations.
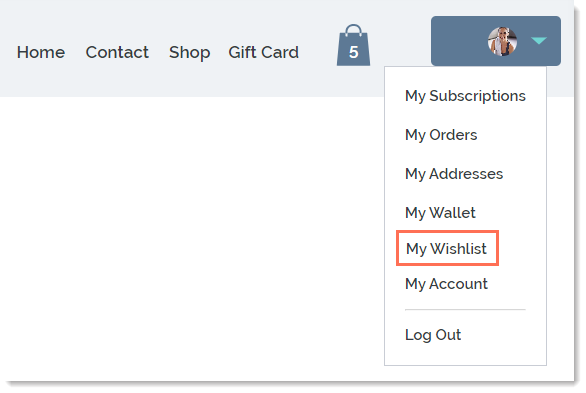
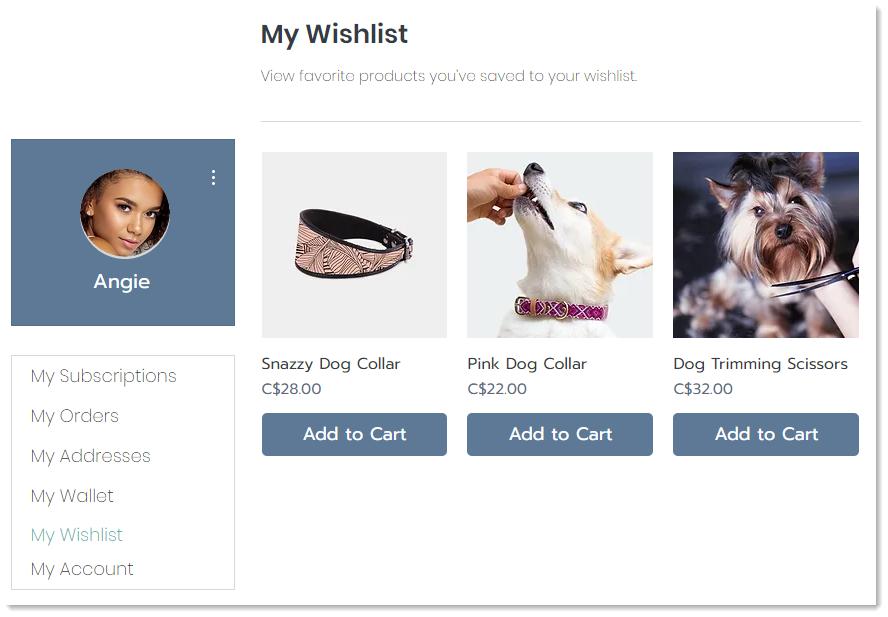
Step 3 | Customizing the My Wishlist page
The My Wishlist page is where customers can view and keep track of their favorite products. You can optionally add an "Add to Cart" button to make it easy for customers to make purchases.
Wixエディター
エディターX
スタジオエディター
- クリック Pages and Menu エディターの左側にある
- Click Members Area.
- Click the My Wishlist page.
- Click the My Wishlist page in the Editor.
- 設定をクリックします。
- Customize the My Wishlist page using the available options.
よくある質問
How can I remove the wishlist from my store?

 and select 削除.
How can I get more information about managing pages in the Members Area?
これは役に立ったか?
|