Wix Studio: Managing Billing and Subscriptions for a Workspace
読了目安: 5分
Manage all the Billing and Premium Subscriptions for a given workspace from the Billing & Subscriptions tab.
The workspace owner can grant individual or team permissions to manage the Billing, Domains, Vouchers and Premium Subscriptions within the workspace. Permissions can be assigned to select sites or, if you prefer, all the sites within the workspace.
この記事では、以下について学ぶ:
Pages within the Billing & Subscriptions tab
The Billing & Subscriptions tab comprises a number of pages related to the account information of a given workspace.
Premium Subscriptions
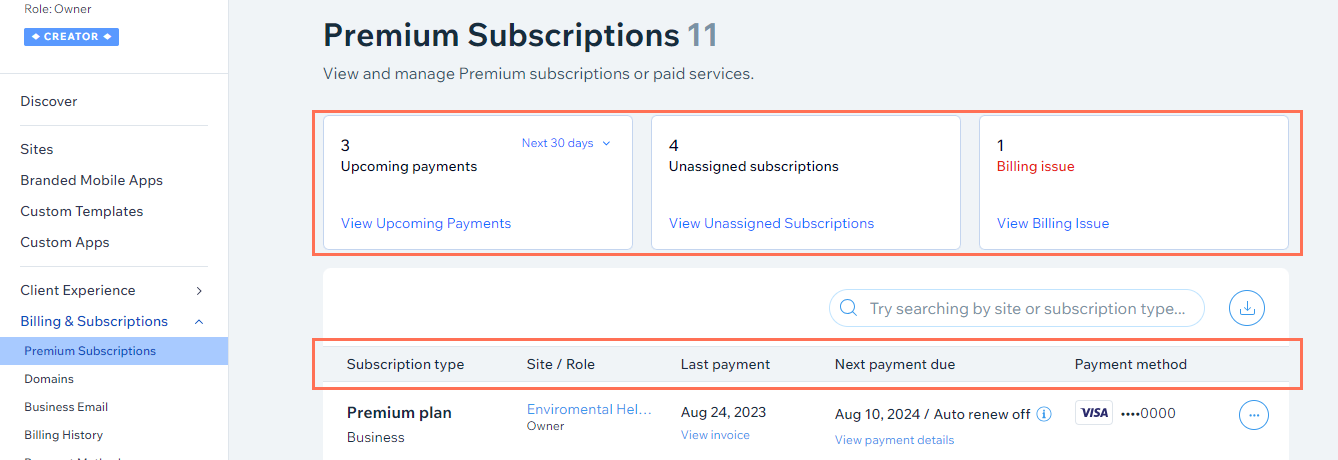
The Premium Subscriptions page shows all the paid services in your workspace purchased through Wix. These include Premium and Studio site plans, domains, business emails, apps and other paid subscriptions. View the upcoming payment date of each service, the relevant payment methods used, information on which site that service has been assigned to, and more. You can also filter the subscriptions by their type, payment dates and status, and export the filtered data as a CSV file.
Important information, such as upcoming payments, unassigned subscriptions and billing issues are highlighted for your attention at the top of the page.
ドメイン
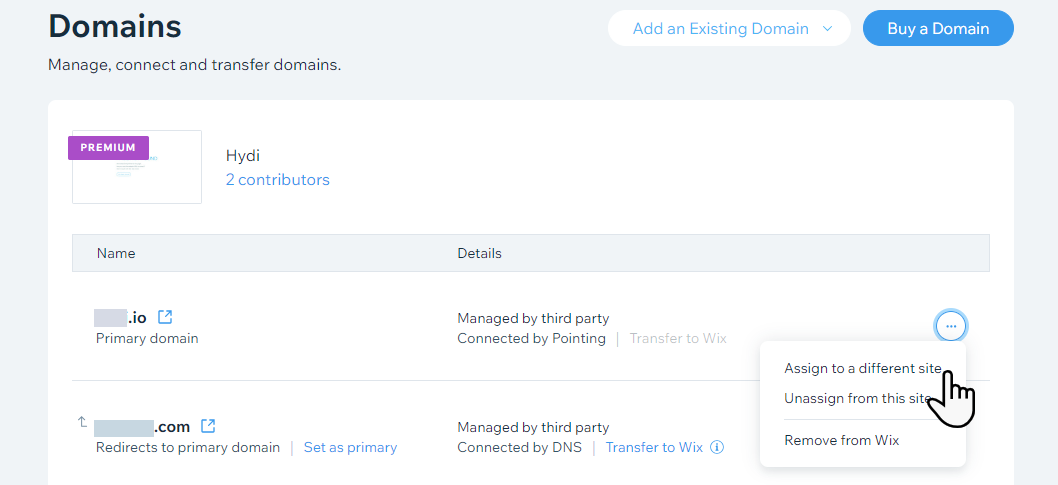
Manage your workspace's domains from the Domains page. From here you can transfer or connect a domain you already own to Wix and assign it to a site, or purchase a new domain directly from your dashboard.
Once you have your domain, you can assign it to any site within your Wix Studio account.
ビジネスメール
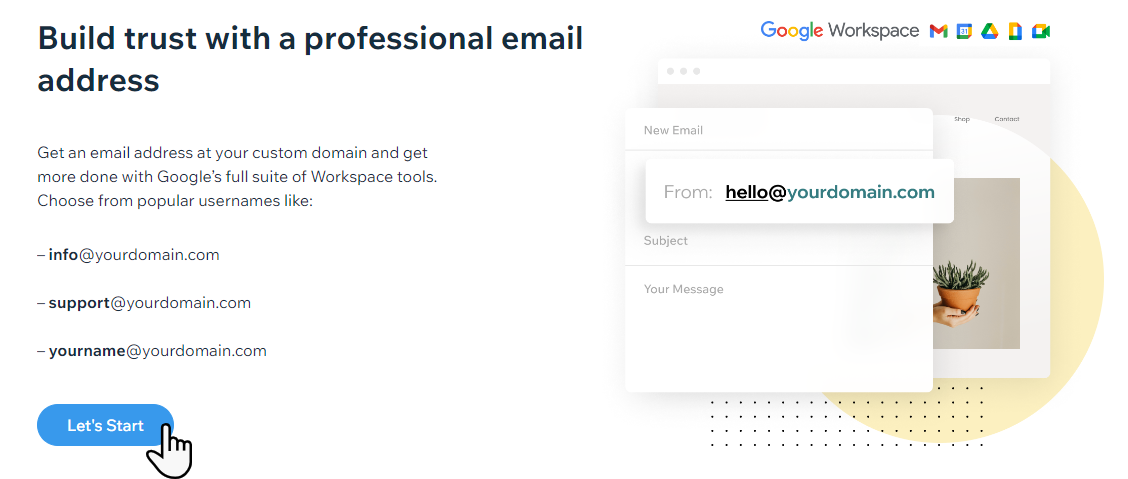
Once a site has a site plan and a domain, you can get a business email. Google Workspace business emails make a business look more professional and help to build trust with customers.
As a reseller of Google Workspace business emails, Wix Studio offers 3 email plans to choose from: Business Starter, Business Standard and Business Plus.
Go to the Business Email page in your Wix Studio account to view prices, purchase and manage a business email, or add an email purchased elsewhere.
Billing History
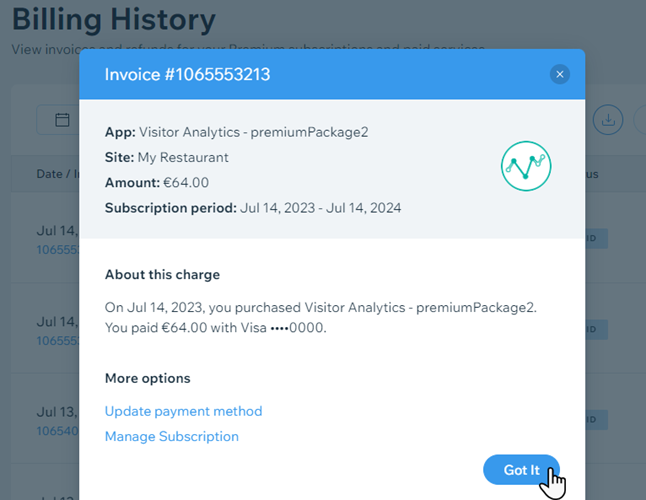
You can view invoices and refunds for payments made to your account for site plans, domains and other paid services on the Billing History page. This page shows all billing activity for a given workspace.
From here, you can also view or print an invoice, update your invoice details, or retrieve more detailed information about any individual charge.
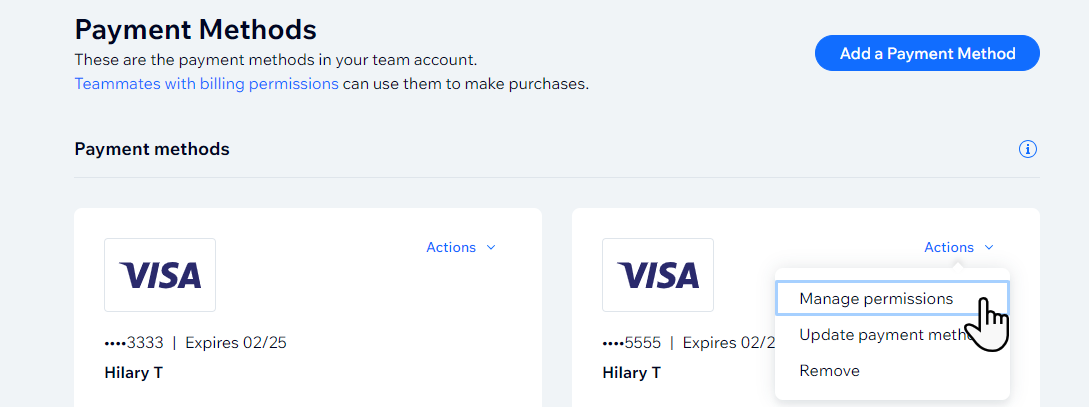
Payment Methods
Use the Payment Methods page to quickly manage your card or other payment methods for premium subscriptions within a Wix Studio workspace. These include site plan renewals, domains, etc. You can update existing card details, add a new card/payment method, or remove a card no longer connected with your Wix Studio services.
For any payment method, you can choose to grant permissions for teammates to use that method to purchase services, or revoke permissions for teammates who no longer need access.
Vouchers
As a promotional gift, you receive complimentary vouchers with the initial purchase of any yearly or multi-year site plan. Go to Vouchers in your Wix Studio workspace to view your available vouchers.
To use a voucher, you'll first need to claim it within 2 months of purchasing your plan. You can then apply it to a site.
Once you've claimed the voucher, follow the instructions on your screen to apply it. Make sure to apply your voucher by the "valid until" date listed on the voucher.

Managing teammates permissions for billing and subscriptions
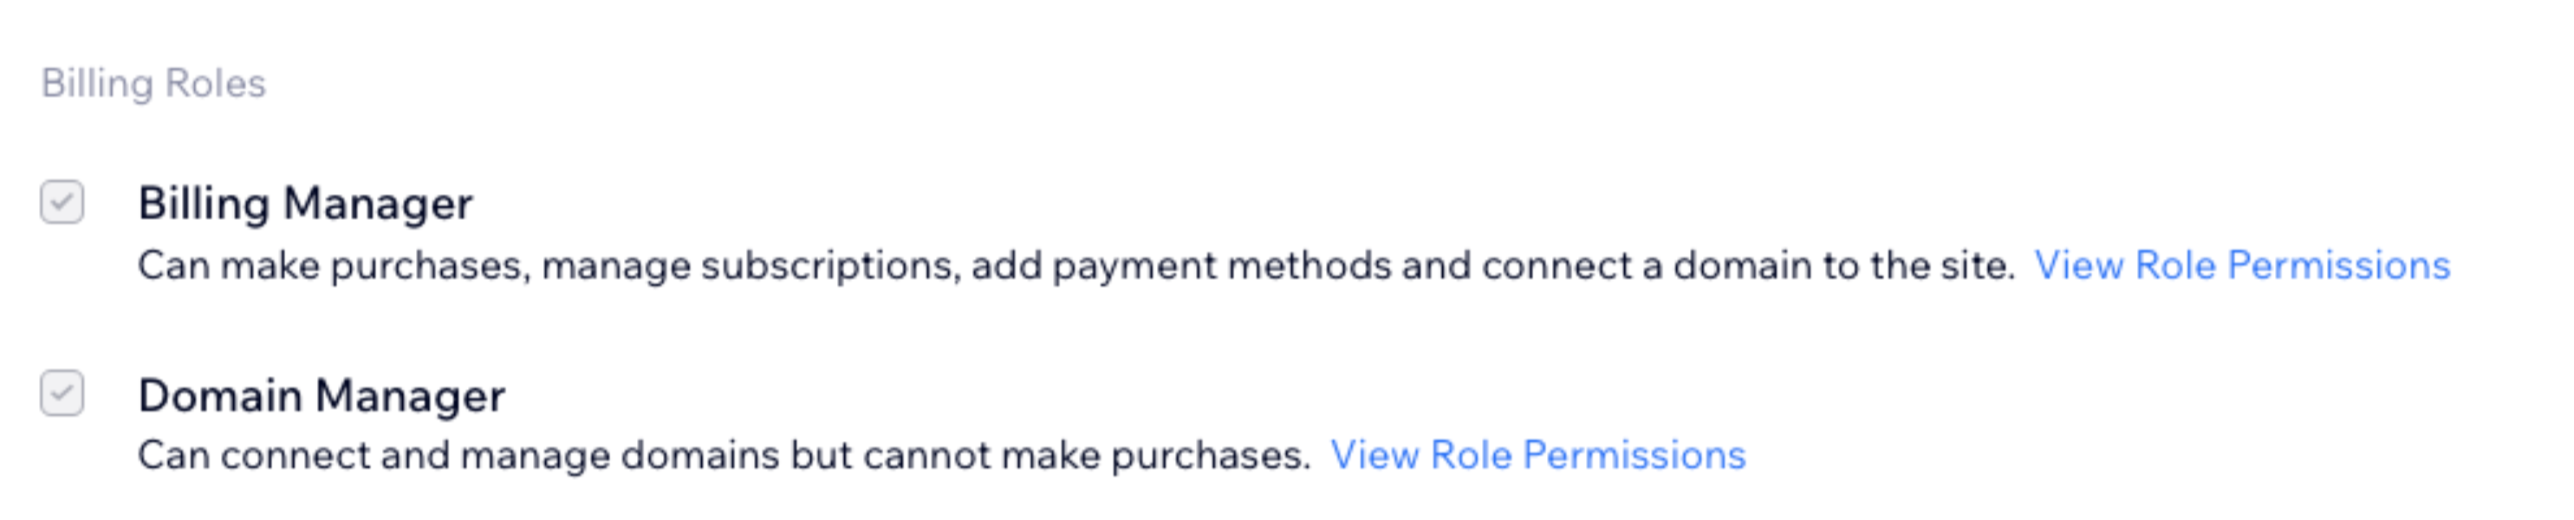
You can tailor each teammate's access individually to ensure that they have the permissions necessary for the area they work in. For example, a teammate who needs to manage subscriptions can be assigned as a Billing Manager, and a teammate who only needs to connect a domain can be assigned as a Domain Manager. You can assign multiple roles to a single teammate.
Teammates can be assigned roles for specific, or all sites, within a workspace and have separate roles for each, as needed. You can change a teammate's role or remove their access at any time.
To invite a teammate to join your team:
- Go to Team in your Wix Studio workspace.
- Click + Invite Teammates.
- Enter your new teammate's email in the Email(s) field.
- Select the checkbox next to the role you'd like to assign this teammate.
- 招待状を送信」をクリックする。
Learn more about managing your team.
Giving clients permissions for billing and subscriptions on their site
Invite a client to join your site by sending them an invitation through your site's dashboard. You can change a client's role or remove their access at any time.
To invite a client:
- Go to Sites in your Wix Studio workspace.
- Hover over the Collaborators icon on the relevant site.
- クリック Invite People.

- Enter your client’s email address.
- Select the checkbox next to the relevant role/s.
- 招待状を送信」をクリックする。
- In the pop-up that appears, select Client and click Done. This collaborator will be marked as "CLIENT" in your Roles & Permissions table. The invitation email they receive and landing page they reach will be tailored to the client experience.
Learn more about inviting clients to collaborate.
これは役に立ったか?
|