Wixのレストランメニューの作成
4 min read
重要だ:
この記事はオリジナルのWixレストランメニューアプリについての記事です。新しくなったメニューアプリをお試しください。Wixレストランメニューアプリ(新)の追加と設定方法についてはこちらをご覧ください。
Display your restaurant's menus directly on your site. Create as many menus as you want (i.e. if you have separate Lunch and Dinner menus) and build sections into each menu to best showcase each dish. If you've enabled Online Ordering, customers can place their orders directly on your site after viewing your menus.
Connected Square POS to Wix Restaurants?
If you have connected Square POS to your Wix Restaurant site, you need to manage your menus through Square.
もっと知りたい?
Check out the course in Wix Learn on creating online menus.
Step 1 | Create the menu sections
Each menu is made up of sections and dishes. Before adding all your dishes, it's a good idea to decide which sections you need. For example, most restaurants have a Starters, Main Course and Dessert section. The default menu comes with 2 default sections. Select a section to edit it and make it yours.
Don't want menu sections?
If you don't want different sections in your menu, create a menu without a description and include only one section. Give that section a name that can serve as a description. Then, add all of your dishes to that one section.
To create the menu sections:
- サイトのダッシュボードにあるメニューに移動します。
- Click the default menu.
- Click the section you want to edit.
- Click Edit next to Section Info at the top right.
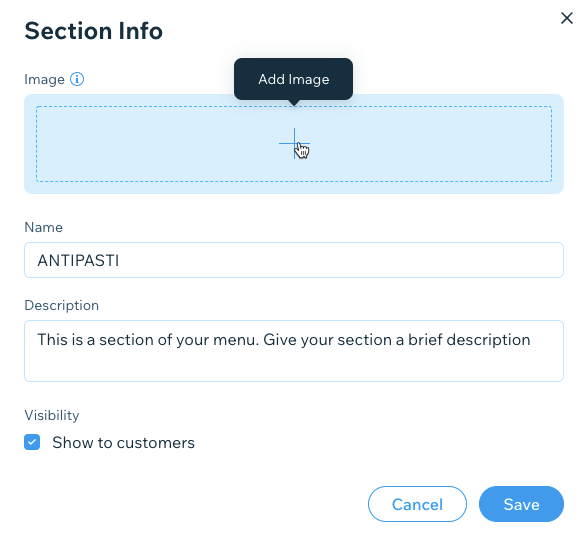
- Edit your menu's section:
- Image: Hover over the section image and click Add Image to change it.
- Name: Enter a name for the menu section.
- Description: Enter a brief description of the menu section.
- Visibility: Select or deselect the checkbox to show or hide the section on your menu.
- 保存をクリックする。
Want to add more sections?
Create as many menu sections as you need. Click + New Section, edit your new section and click Add.
Step 2 | Add your dishes
Now it's time to add your dishes to the menu. Start by editing the default menu items and then click Add Dish to add your own.
To add your dishes:
- サイトのダッシュボードにあるメニューに移動します。
- Select the relevant section.
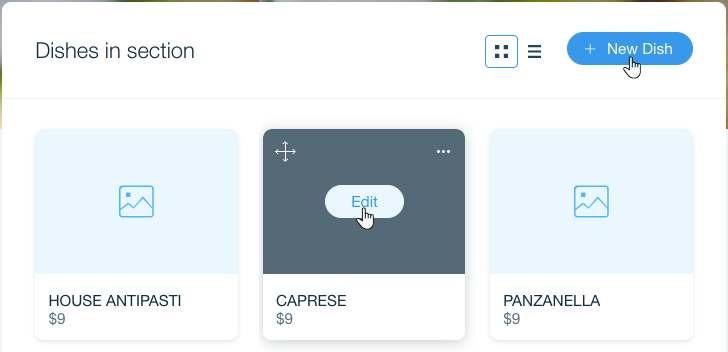
- Do one of the following:
- Edit an existing dish:
- Hover over one of the default dishes and click Edit.
- Click Edit at the top right of Dish Info.
- Add a new dish:
- Click New Dish at the top.
- Edit an existing dish:
- Enter the dish info:
- Image: Hover over Click to add an image and click the + icon to add an image to the dish.
- Name: Enter the name of the dish.
- Description: Describe the dish so that customers know what they're ordering.
- Price: Enter the price of the dish.
- Tax: For prices that don't already include tax, enter the tax percentage that should be added.
- Dish labels: Add labels to help customers identify key information about the dish (Vegan, Gluten Free, Spicy, etc.).
- Visibility: Select or deselect the checkbox to show or hide the section on your menu.
- 保存をクリックする。
Selections, extras and removing ingredients:
Add even more options to your dishes in the Dish Options section. From here, you can add any of the following to your dishes:
- Selection: Customers need to select a single option, such as the size of their pizza, or how well done their burger should be.
- Extras: Customers can select multiple options, such as toppings for a pizza.
- Deselection: Customers can remove ingredients from their order, such as onions from a salad.
よくある質問
Can I reorder the sections on my menu?

How do I hide a section?

Can I delete a menu?
Can I use the same dish in different menus?
これは役に立ったか?
|