Enterprise Solution: Managing Access to Your Sites using IP Allowlisting
4 min read
IP allowlisting is a method for restricting access to a URL. It works by checking the Internet Protocol (IP) addresses of visitors against a list of approved IP addresses. If a visitor tries to access a URL from an IP address that is not on the list, they are automatically blocked. This can help prevent unauthorized access to a site's resources.
You can use the Wix enterprise solution's IP Allowlisting feature to create rules that limit access to your sites. For example, you can create a rule to allow access only to visitors from your organization's IP addresses. Select which URLs on your account that you want to include in your rule and enter the IP addresses that are allowed to access them.
Learn more about Wix Studio for enterprise or contact our sales team.
この記事では、その詳細について説明する:
Creating an IP Allowlisting rule
You can create new IP Allowlisting rules in the Settings section of your enterprise dashboard. Use any of the following formats for your IP addresses:
Format | 例 |
|---|---|
Single IP address | 40.77.182.32 |
IP address range | 40.77.182.32-40.77.182.200 |
Classless Inter-Domain Routing (CIDR) notation | 40.77.183.32/27 |
重要だ:
A URL can only be used in one rule at a time. You can't create two rules that contain the same URL.
To create a rule:
- Go to your enterprise dashboard.
- Hover over Security in the left sidebar.
- Select IP Allowlisting.
- Click Create Rule.
- Enter a name for the rule.
- Click the Add URLs drop-down.
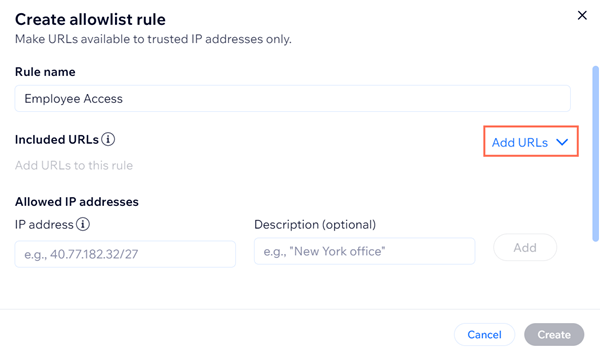
- Select the URLs on your account that you want to include.
- Enter an IP address under Allowed IP addresses.
- (Optional) Add a description to help you remember what the IP address is for.
- Click Add.
- Repeat steps 7-10 for all of the IP addresses that you want to add.
- 作成」をクリックする。
Editing an IP Allowlisting rule
You can edit an IP Allowlisting rule in the Settings section of your enterprise dashboard.
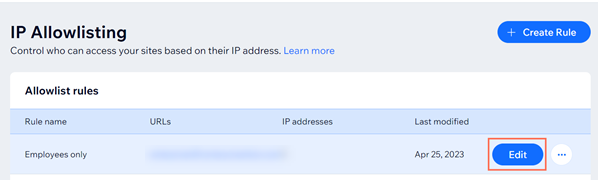
To edit a rule:
- Go to your enterprise dashboard.
- Hover over Security in the left sidebar.
- Select IP Allowlisting.
- Hover over the rule that you want to update.
- 編集をクリックする。
- Make your changes to the rule.
- 保存をクリックする。
Deleting an IP Allowlisting rule
You can delete an IP Allowlisting rule in the Settings section of your enterprise dashboard.
重要だ:
It is not possible to recover a rule after you delete it.
To delete a rule:
- Go to your enterprise dashboard.
- Hover over Security in the left sidebar.
- Select IP Allowlisting.
- をクリックする。 その他のアクション アイコン
 beside the rule that you want to delete.
 - Select Delete.
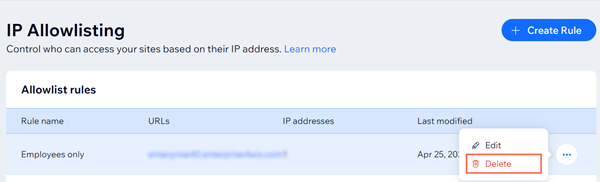
- Click Delete.
Troubleshooting IP Allowlisting issues
If you're experiencing issues when you try to create a rule, try the steps below:
Make sure that you haven't used the URL in another rule
Check the format of your IP address
Check your IP address for any spaces or incorrect characters
Make sure you haven't used the same IP address more than once in your rule
これは役に立ったか?
|