Wix Blog: Showing or Hiding Information in Your Wix Blog
読了目安: 5分
You can choose exactly what information and sharing options (date, author name, etc.) you want to display in the different views and blog elements of your blog. For example, you may want to display fewer details in mobile view to give readers a cleaner reading experience.
In this article, learn more about showing or hiding information:
Showing or hiding information in a blog or category feed
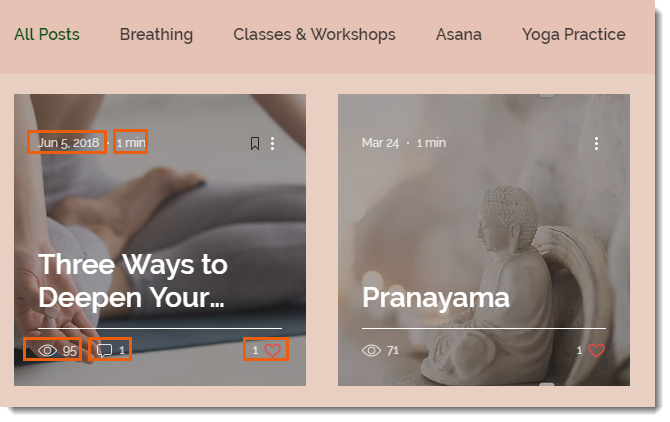
You can control what information appears across your blog feed as a whole or across a category feed.
Wixエディター
Wixスタジオ
- 編集者のところに行ってください。
- Go to your Blog page:
- クリック ページ&メニュー
 エディターの左側にある
 - Click Blog Pages.
- Click your Blog page.
- クリック ページ&メニュー
- 設定をクリックします。
- Click the Display tab.
- Select or deselect the relevant checkboxes.
- Scroll down and click Blog menu.
- をクリックする。 Show blog menu toggle to enable or disable it:
- Enabled: Your blog menu is displayed on your blog.
- Customize what is shown on your blog menu.
- Disabled: Your blog menu is not displayed on your blog.
- Enabled: Your blog menu is displayed on your blog.
- Click Back.
- Click Social Sharing.
- Click the Enable social sharing toggle to enable or disable it:
- Enabled: Social share icons for Facebook, X, LinkedIn and Shareable link icons are displayed on your blog.
- Disabled: Social share icons are not displayed on your blog.
注:
Make sure to save and publish your site for the changes to take effect.
Showing or hiding information on a Post page
Your Post page is the dedicated blog page which opens when your reader selects a specific post. You can choose what information you want to display on this page. Any settings you make here apply to every post in your blog.
注:
We released a new version of the Post page in November 2023. All blogs installed before this date have the old Post page experience. We will gradually migrate all blogs over to the new Post page over the coming months. The steps below refer to the old version of the Post page.
Wixエディター
Wixスタジオ
- 編集者のところに行ってください。
- Go to your Post page:
- クリック ページ&メニュー エディターの左側にある
- Click Blog Pages.
- Click Post.
- クリック ページ&メニュー
- Click the Post page element on your page.
- 設定をクリックします。
- 表示タブをクリックする。
- Click the checkboxes next to the information you want to display.
- Click Blog Menu.
- をクリックする。 Show blog menu toggle to enable or disable it:
- Enabled: Your blog menu is displayed on your blog.
- Disabled: Your blog menu is not displayed on your blog.
- (Optional): Customize what is displayed on your blog menu.
- Click Back.
- Click Share and print.
- をクリックする。 Enable share and print icons toggle to enable or disable it:
- Enabled: Social share and print icons are displayed on your blog post.
- Disabled: Social share and print icons are not displayed on your blog post.
- (Optional): Customize your share and print settings.
- Click Back.
- Click Related Posts.
- をクリックする。 Show related posts toggle to enable or disable it:
- Enabled: A related posts element is added to the bottom of your post. This shows snippets of similar posts from your blog.
- Disabled: A related posts element is not added to the bottom of your post.
- (Optional): Customize the related post settings.
注:
Make sure to save and publish your site for the changes to take effect.
よくある質問
Click a question below to find out more information.
What is the difference between my blog feed and my blog Post page?
Can I customize what is displayed on a mobile view?
これは役に立ったか?
|