Studio Editor: Using Containers
読了目安: 3分
Containers are responsive layout tools that help you streamline and structure site content. You can customize them to complement the site's design, and attach elements such as text, media, and buttons.
この記事では、その詳細について説明する:
Adding containers to a site
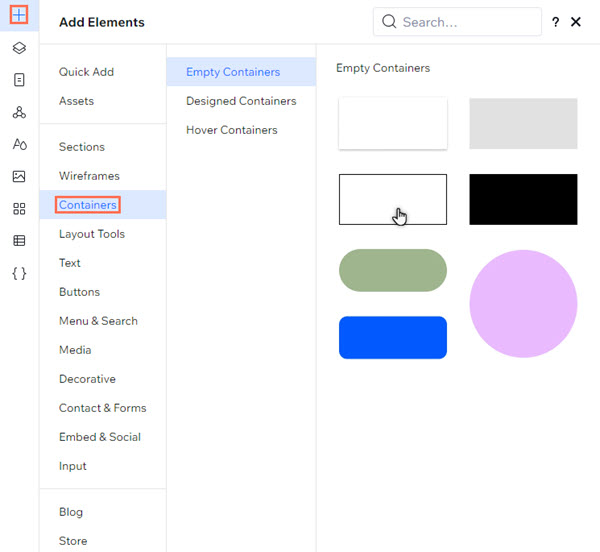
Get started by adding a container to suit the client's design and content needs. You can choose from a range of pre-designed and hover containers, or start from scratch with a blank design.
To add a container:
- クリック エレメントの追加
 エディターの左側にある
 - Select Containers.
- Choose a container style (Empty, Designed, or Hover).
- Click and drag your chosen container to add it to the page.
Designing containers
Customize the container's design to complement the site's aesthetic. You can change the background color, set the radius, and more.
To design a container:
- Select the relevant container.
- をクリックする。 Open Inspector アイコン
 at the top right of the editor.

- Choose how you want to customize the container under Design:
- Background: Set the background fill color and make it more or less visible.
- Glass effect: Apply a frosted glass effect to the container and set the intensity of the blur.
- Border: Add a border to the container and use the options to set its size, color, and opacity.
- Corners: Adjust the radius of the container's corners (in px) to make them more round or square.
- Shadow: Add and customize a shadow effect on the container.

Attaching elements to containers
When you place elements inside a container, they are automatically attached. This means you can drag the container and its attached elements as whole, and view them together in the Layers panel.
To attach an element to a container:
- Click the relevant element.
- Drag it to its desire position in the container.
- Drop the element when you see the Attach message.

Applying a grid to a container
Apply an advanced CSS grid to the container to structure its layout. You can choose the number of rows and columns you want, and set their size using responsive measurements (e.g. fr, Min/max, %)
To apply a grid to a container:
- Select the relevant container.
- をクリックする。 その他のアクション アイコン
 .
. - Click Apply Advanced CSS Grid.
- Choose a layout from the 1x1 drop-down.
Tip: Select Other if you want to set your own number of rows and columns.

これは役に立ったか?
|