CMS: Setting Up a Multi-Checkbox Input Element
18分
Use the Multi-Checkbox input element to let visitors filter live site content or submit multiple choice responses.
For instance, imagine you run an online bookstore. You can use a Multi-Checkbox input element to let visitors filter books by genre, author, or publication year. This not only improves their browsing experience but also helps you understand their preferences better.
Or, you could set up the Multi-Checkbox element to collect information about the types of books your visitors enjoy. For example, you can ask users to select their favorite genres, such as mystery, romance, or science fiction, when they sign up for your newsletter. This collected data can help you tailor your marketing efforts and recommend books that align with their interests.
ヒント
This article is about setting up the Multi-Checkbox input element. Alternatively, you can use a single Checkbox input element to let visitors filter or submit content. The single Checkbox input element works with boolean (true or false) collection fields only.
Using the Multi-Checkbox input element to filter content on your live site
Connect your Multi-Checkbox input element to the same dataset as your repeater, gallery, or table and set it to filter content. Then choose the collection field you want to use as the filter and the condition for applying the filter. The values from the field will appear as checkboxes your visitors can click to filter items displayed in the repeater, gallery or table.
Wixエディター
スタジオエディター
- 編集者のところに行ってください。
- Add the Multi-Checkbox input element:
- Go to the page where you want visitors to use checkboxes to filter live site content.
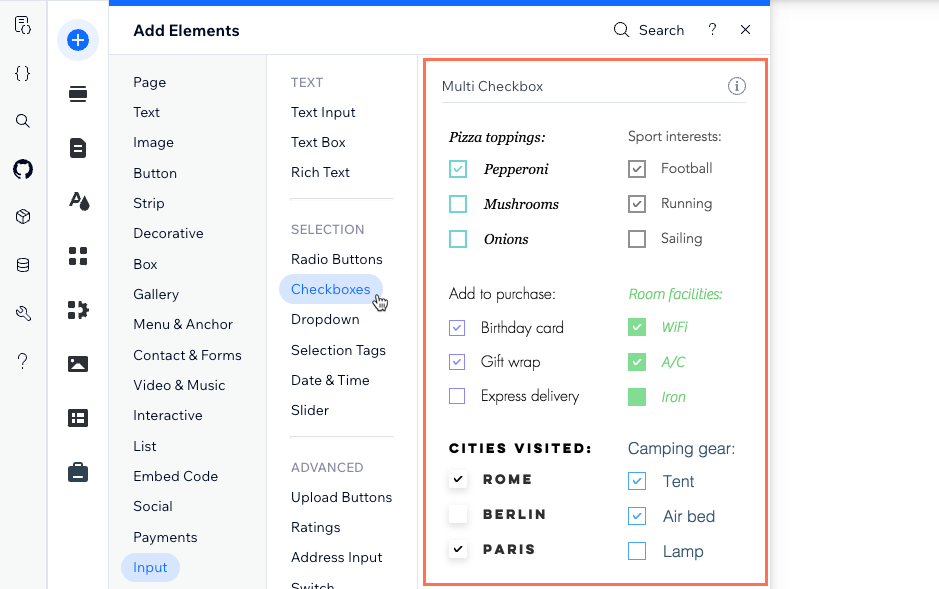
- クリック エレメントの追加
 エディターの左側にある
 - Click Input.
- Click Checkboxes.
- Click and drag the relevant Multi-Checkbox input element onto the page.
- Connect the Multi-Checkbox element to the CMS:
- をクリックする。 CMSへの接続 アイコン
 on the Multi-Checkbox element.
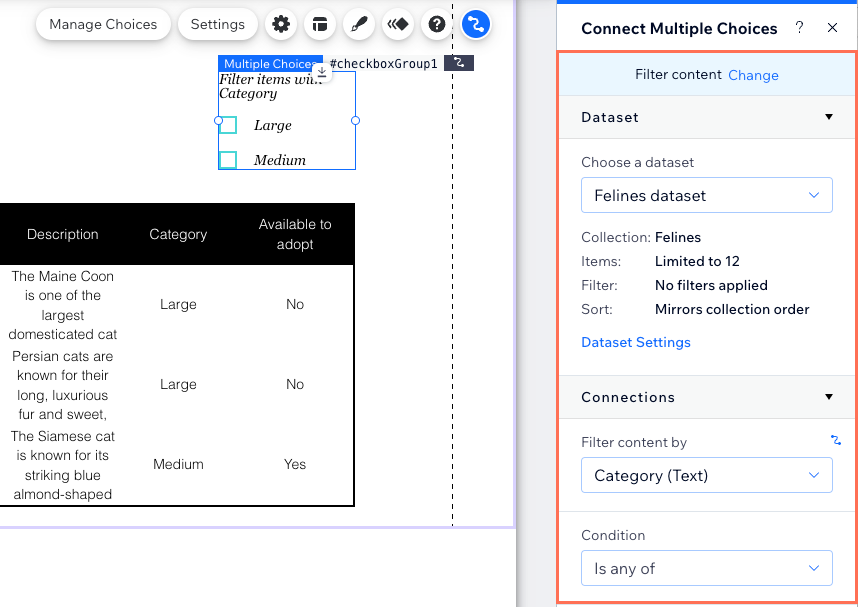
 - Select Filter content in the panel on the right.
Tip: If you haven't added a dataset to the page yet, add a dataset first (see the next step) then select Filter content. - Click the Choose a dataset drop-down and select the same dataset that connects to the elements (e.g. repeater, gallery, table) that you want visitors to filter.
- Click the Filter content by drop-down and choose the collection field that visitors will use to filter the content. You can connect the following field types: Text, Number, Tags, Reference
Tip: To add a new field to your collection and use it for filtering content, select Add new field, enter the field name, select the field type, and click Add. You can add values to the field in your CMS collection later. - Click the Condition drop-down and choose an operator that controls how the filter is applied (e.g. Is any of, Equals any of, Includes any).
Note: The conditions vary depending on the connected field type.
- をクリックする。 CMSへの接続 アイコン
- Customize the Multi-Checkbox input element:
- をクリックする。 設定 アイコン
 to edit the field title that lets visitors know what the checkboxes do.
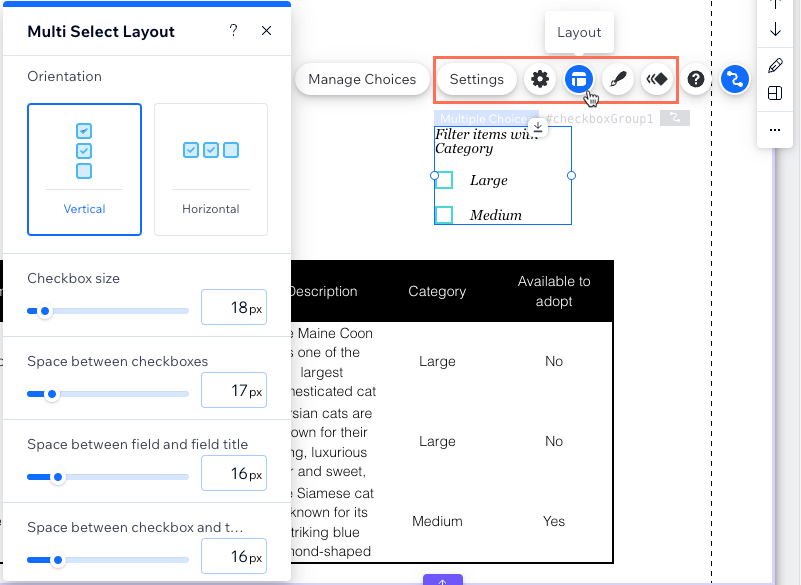
 - をクリックする。 レイアウト アイコン
 to choose a horizontal orientation or adjust the sizing, spacing, formatting, alignment or text direction.
 - をクリックする。 Design アイコン
 to choose a preset design and customize it further.
 - をクリックする。 Animation アイコン
 to choose and customize an animation effect.
- をクリックする。 設定 アイコン
- Click Preview to test your Multi-Checkbox element.
- 変更を公開する準備ができたら、「公開」をクリックします。
Using the Multi-Checkbox input element to collect responses from site visitors
Set the Multi-Checkbox input element to collect content and connect it to a dataset that binds to a collection where you will store the responses. Then set up the choices that visitors can select from in the checkboxes. When visitors click your submit button, their responses are saved to a tags field in your collection.
Wixエディター
スタジオエディター
- 編集者のところに行ってください。
- Add the Multi-Checkbox input element:
- Go to the page where you want visitors to click checkboxes to submit responses.
- クリック エレメントの追加 エディターの左側にある
- Click Input.
- Click Checkboxes.
- Click and drag the relevant Multi-Checkbox input element onto the page.
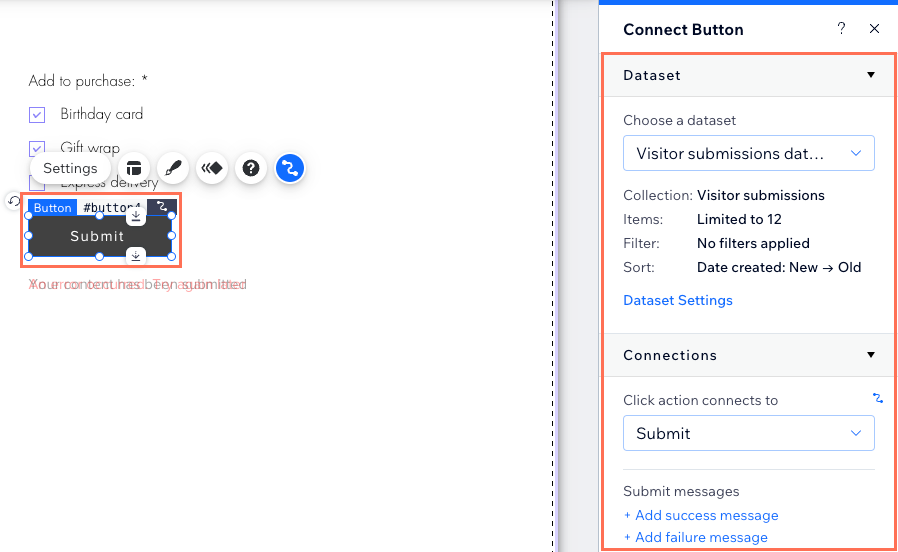
- Connect the Multi-Checkbox element to the CMS collection where you will store the submissions:
- をクリックする。 CMSへの接続 アイコン on the Multi-Checkbox element.
- Select Collect content in the panel on the right.
Tip: If you haven't added a dataset to the page yet, add a dataset first (see the next step) then select Collect content. - Click the Choose a dataset drop-down and select a dataset that connects to the collection where you will store the submissions.
- Click the Value connects to drop-down and choose a Tags field to store the submissions.
Tip: To add a new field for storing submissions, select Add new field, then enter the field name and click Add. - Set the dataset mode and collection permissions:
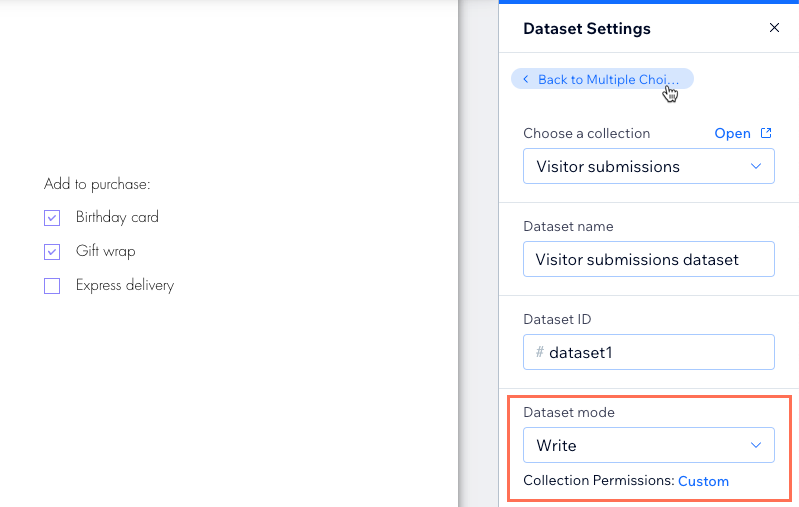
- Click Dataset Settings.
- Click the Dataset mode drop-down and select Write.
- (If necessary) Click the permission type next to Permissions to edit your collection's permissions & privacy settings. Then choose the type of permissions you want to set:
- Collect content: Allow visitors to add content to the collection with input elements or API. Then choose who can add content to the collection and who can view the content. Then click Save.
Note: This permission does not allow visitors to update existing content in the collection. Use the Custom permissions if you want to allow visitors to update existing content. - Custom: Set custom permissions to control who can view, add, update, and delete content. You can choose different permissions for item creators, site members, and everyone else. Click Save when you're done setting the permissions.
- Collect content: Allow visitors to add content to the collection with input elements or API. Then choose who can add content to the collection and who can view the content. Then click Save.
- Click Back to Multiple Choices element at the top of the Dataset Settings panel.
- をクリックする。 CMSへの接続 アイコン
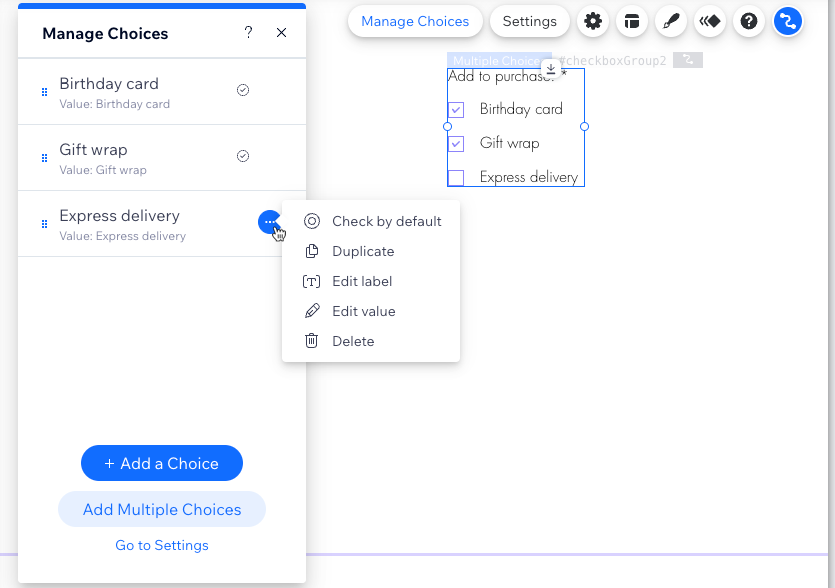
- クリック Manage Choices and choose how you want to set up the choices that appear as checkboxes:
- Bulk add or remove choices: Click Add Multiple Choices and enter all the choices with each separated by a comma. Then click Back to return to the choices.
- Add a choice: Click + Add a Choice, then use the options to customize it.
- Edit a choice label: The label is the text visitors see next to the choice's checkbox. Double-click the relevant choice to edit its label.
- Edit a choice value: The value is the text that is saved to your collection field when visitors submit their response. Hover over the relevant choice, click the その他のアクション アイコン
 and select Edit value.
 - Remove a choice: Hover over the relevant choice, click the その他のアクション アイコン and select 削除.
- Reorder choices: をクリックする。 Reorder アイコン
 next to the relevant choice and drag it up or down in the list of choices.
 - Set a choice as checked by default: Hover over the relevant choice, click the その他のアクション アイコン and select Check by default.
- Duplicate a choice: Hover over the relevant choice, click the その他のアクション アイコン and select Duplicate.
- Customize the Multi-Checkbox element's settings layout and design:
- をクリックする。 設定 アイコン to edit the following:
- Field title: Edit the title text that lets visitors know what the checkboxes do.
- Field type: Select the Required checkbox to make it mandatory that at least one checkbox is selected before the response can be submitted to your collection.
- をクリックする。 レイアウト アイコン to choose a horizontal orientation or adjust the sizing, spacing, formatting, alignment or text direction.
- をクリックする。 Design アイコン to choose a preset design and customize it further.
- をクリックする。 Animation アイコン to choose and customize an animation effect.
- をクリックする。 設定 アイコン
- Add a 'Submit' button for visitors to click to send their submissions.
- Click Preview to test your connections.
- 変更を公開する準備ができたら、「公開」をクリックします。
よくある質問
Click a question below to learn more about the Multi-Checkbox input element.
Is it possible to pre-check the checkboxes for visitors?
Can I collect multiple checkbox responses in one form?
Which collection fields can I connect the Multi-Checkbox element to?
Why can't I connect the checkboxes to my collection fields?
これは役に立ったか?
|