Wix Editor: Adding and Setting Up a Box
読了目安時間: 2分
Adding a box to your page can help create a stunning, original look on your Wix site. Choose from a range of different styles, shapes and colors, attach elements to a box and use them to group elements together.
Learn how to:
Adding a box
Boxes make it easy to design beautiful looking pages that are structured and look professional. They come in lots of shapes and styles so pick your favorite and start experimenting!
To add a box:
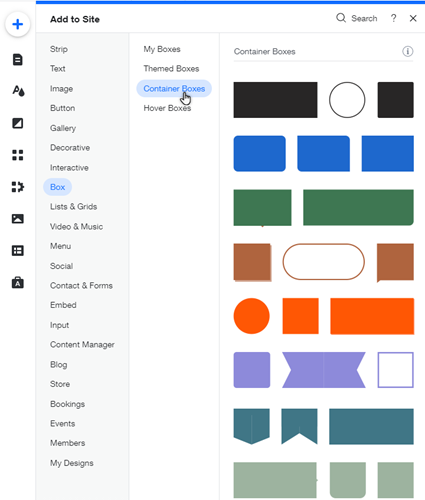
- クリック 追加
 エディターの左側にある
 - Click Box.
- Click Container Boxes.
- Drag a box element on to your page.
ヒント
You can attach almost anything to container boxes and move them around your pages in one block of content. Use them to create text boxes, banners, headers, logos and more.
Customizing your box design
Choose a box from the wide range of shapes available. Then customize your box to match your site.
To customize a box design:
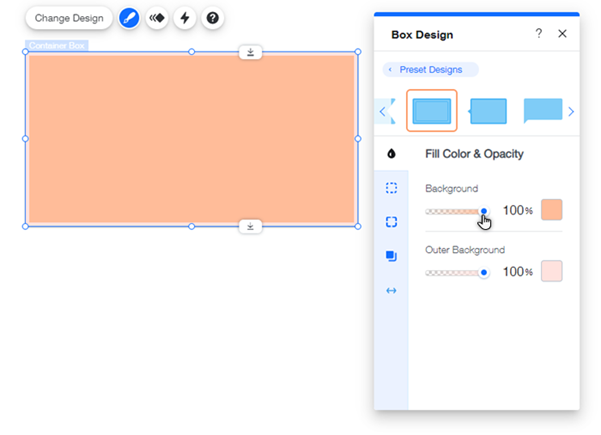
- をクリックする。 Design アイコン
 .
. - Select a preset design or click Customize Design.
- Customize your box using the following options:
- Fill Color & Opacity: Select the box's colors and opacity.
- Drag the slider to change the opacity.
- Click the color box to change the color.
- Select a color from the Color Picker.
- Click X to close the Color Picker.
- Borders: Design your box's borders.
- Drag the slider to change the opacity.
- Click the color box to change the color.
- Drag the slider to change the width
- Corners: Round your box's corners.
- Shadow: Design a shadow for your box.
- Spacing: Customize the box border spacing.
- Fill Color & Opacity: Select the box's colors and opacity.
注:
The customization options available depend on the preset you choose at the top of the panel.
これは役に立ったか?
|